Mast Building DIY Style
Lots of people have asked more on how i went about building the rig
It's a mix of ideas poached from other people and things that come to you during 4 years of building the rest of the boat
It added about 6 months to the build time of the boat but saved hell of a lot of money
It's a mix of ideas poached from other people and things that come to you during 4 years of building the rest of the boat
It added about 6 months to the build time of the boat but saved hell of a lot of money
Structure
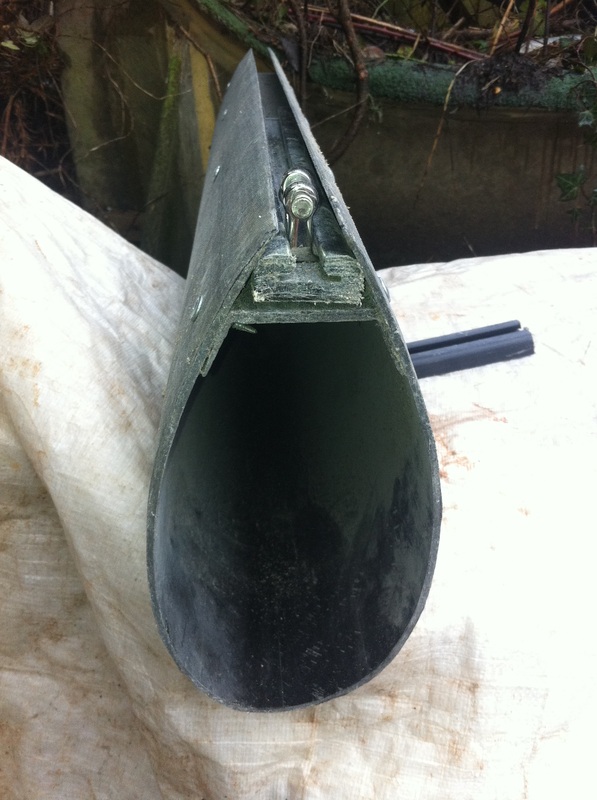
The whole mast is build around the Tides Marine sail track.
I wanted the track in the mast rather than just bolted on the back, so it sits on a channel that is bonded to the back of a foil section [The fastenings in the pic are temporary]
The lay-up is uni-direction carbon sandwiched in between 2 layer of biax.
As with the rest if the boat, it is all held together with West System Epoxy
The section measures 115 x 220
Strong back table
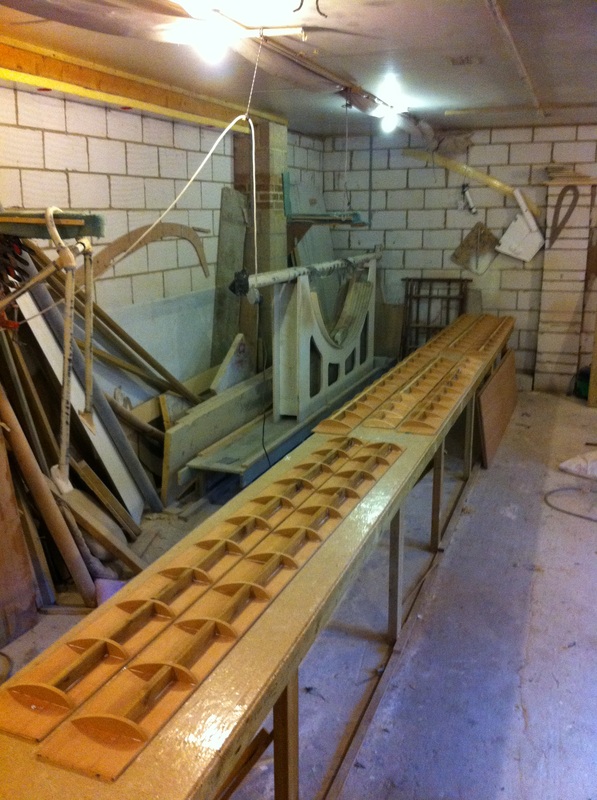
The mast is made on the outside of a male mould.
I was going to make one 14 meter long mould, but it was pointed out to me that as I was going to double up the walls of the mast to stop compression behind the spreaders - this would be a good point to make a socket type join.
The spreaders aren't in the middle so the mould needed to be about 9 meters long in this case.
1st job was to make a 9m long table that was dead straight and level.
I made a template of the half section of the mast. I needed about 80 of these so I bought a band saw.
I threw the band saw away and got the formers cut by someone with a CNC cutter instead!
These were then assembled on 12mm ply backing at about 300mm centres with batten stringers in between
Mould making

A plywood web was screwed to the side of the table and the backing/formers were screwed to that
Obviously, it is important to get things straight and true at this stage
Obviously, it is important to get things straight and true at this stage
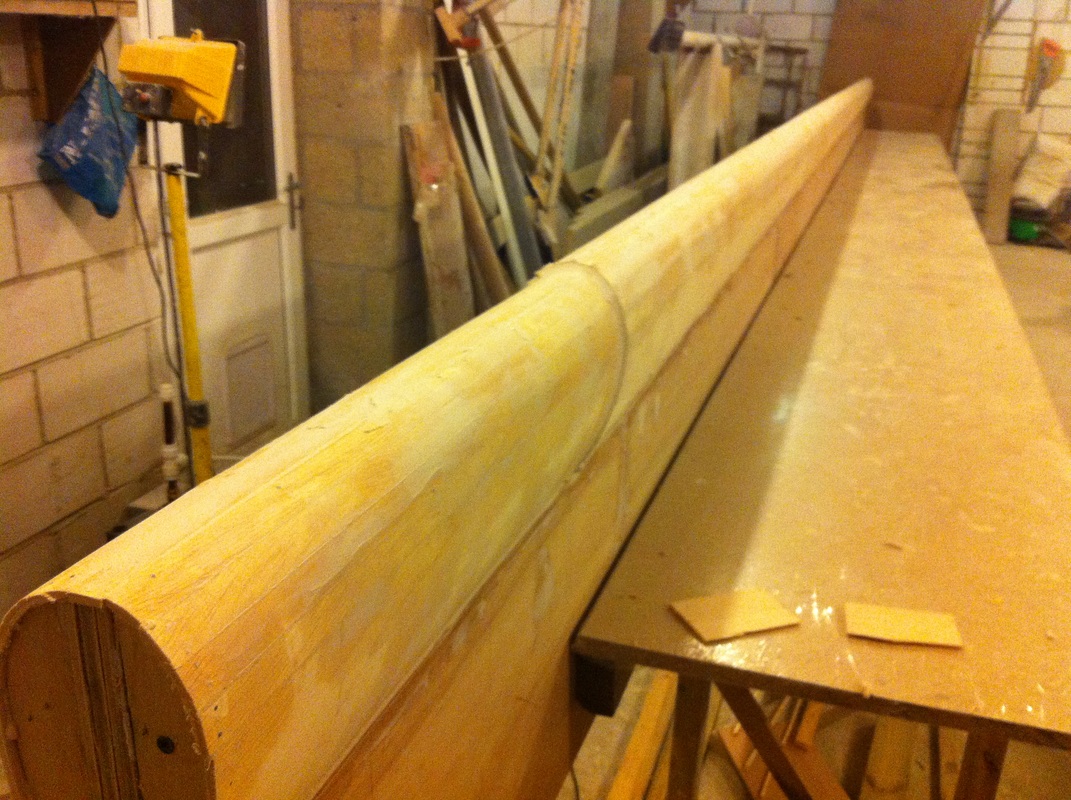
The formers were strip planked with strips of thin plywood and lots of staples and glue.
Anything made of timber will leech air when you try and vacuum bag onto it, so I sheathed the whole thing in 300g biax to seal it.
Then came enough filling and fairing to just get the shape even.
A couple of rolls of my favourite parcel tape were used to make the release surface.
The formers were reduced to make the spiggot section in the foreground.
Laminating
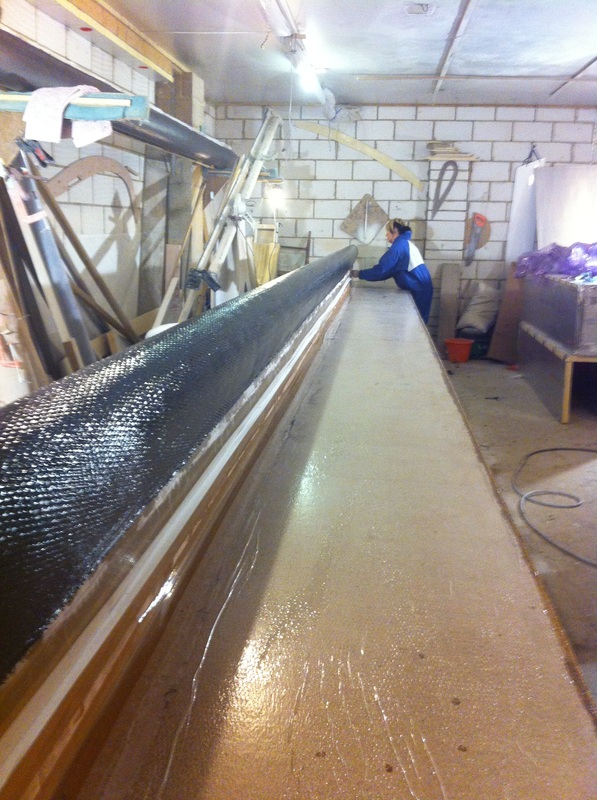
The lay-up was done in 2 hits; the inner layer of biax and half the uni went on in the first and then the same in reverse for the 2nd. The first reason for this was that the test section that I did in one hit, had wrinkles and the second reason is that I didn't want the epoxy to 'cook off' because it was too thick.
The carbon was wetted out on the flat table, rolled around a 100mm pipe and then drapped out on the mould pre-preg style! This meant much cleaner and controled working. There was no need to put anything on the carbon [Like polythene] as it is rolled, just as long as you have a pair of scissors to hand as you un-roll it to cut any odd fibres that have got caught up.
The lay-up was vac-bagged to about 20" and then the insullation boxes that can be seen behind Claire on the floor, were put over it all with some tube heaters inside while it cured.
The next day, unwrap it and add the next layers.
Fittings
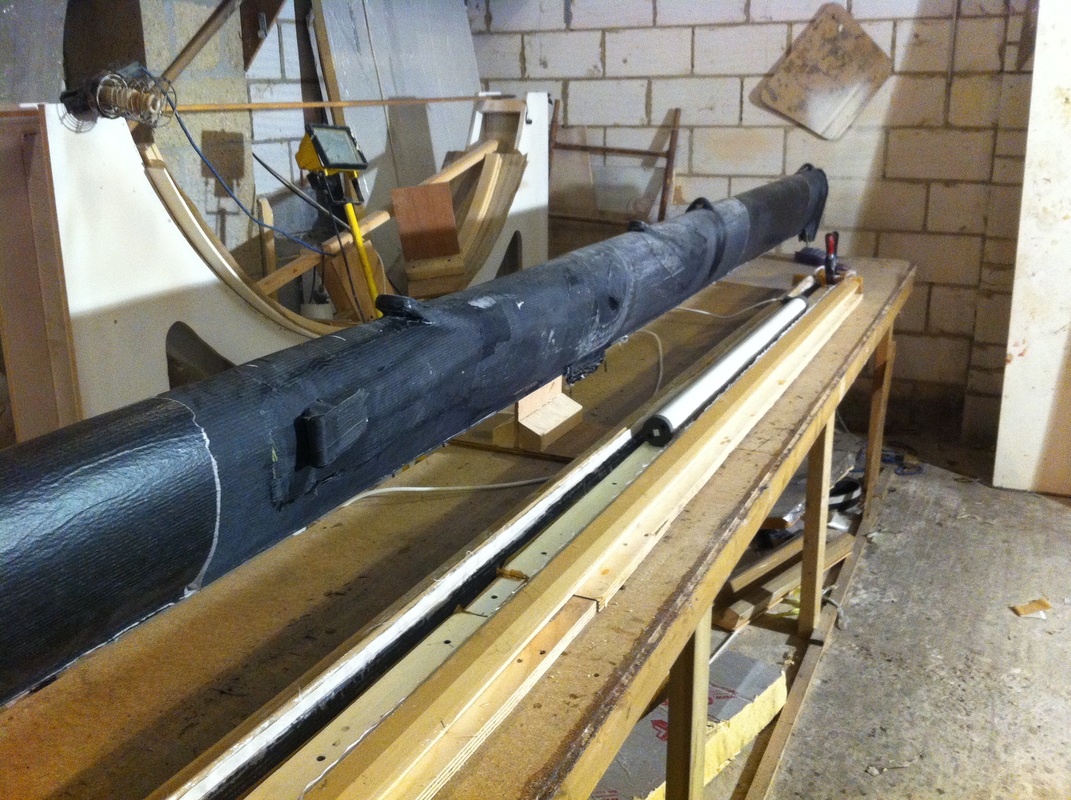
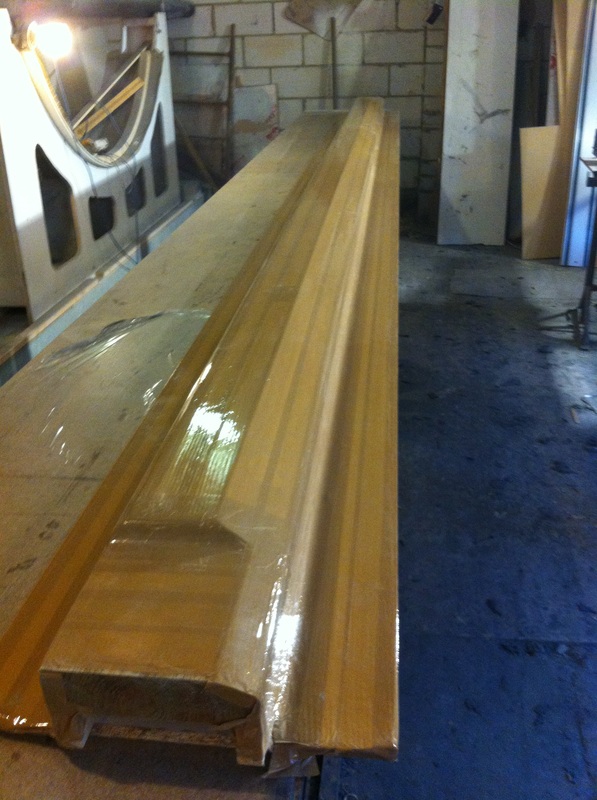
Once cured, the laminate can be slid off the mould without too much trouble. The option was to knock a hole in the wall or lift the whole thing outside to have enough space.
The mould for the channel that forms the back edge is on the table
The top section is mounted on stands while the fittings are added. the stands are the same thickness as the mould base so that the mast shape is maintained all the time
Fittings are anchored in place with uni carbon and then overlayed with biax
Spreaders
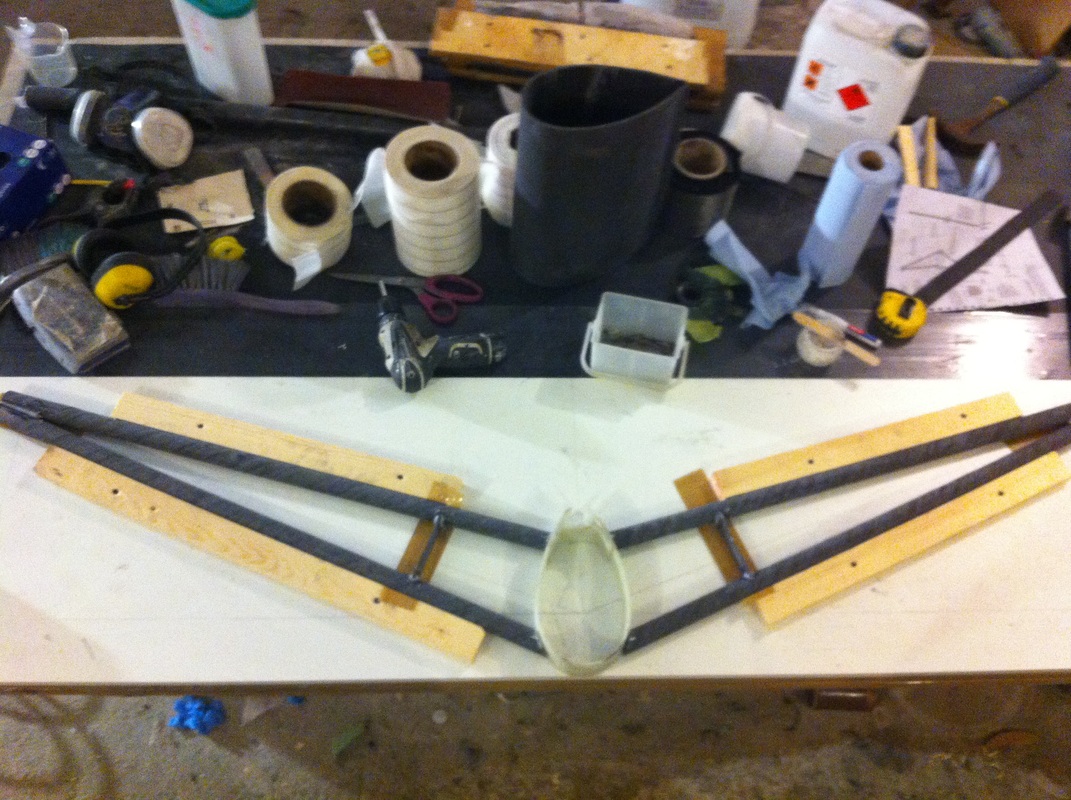
The work of the spreaders is done by two over-strength carbon tubes. The gap in between will be filled with 5kg foam and then the whole thing wrapped in biax.
A collar was made around the mast and becomes integral with the spreaders at this stage. The whole thing is sprung around the mast and just bonded into place
A collar was made around the mast and becomes integral with the spreaders at this stage. The whole thing is sprung around the mast and just bonded into place
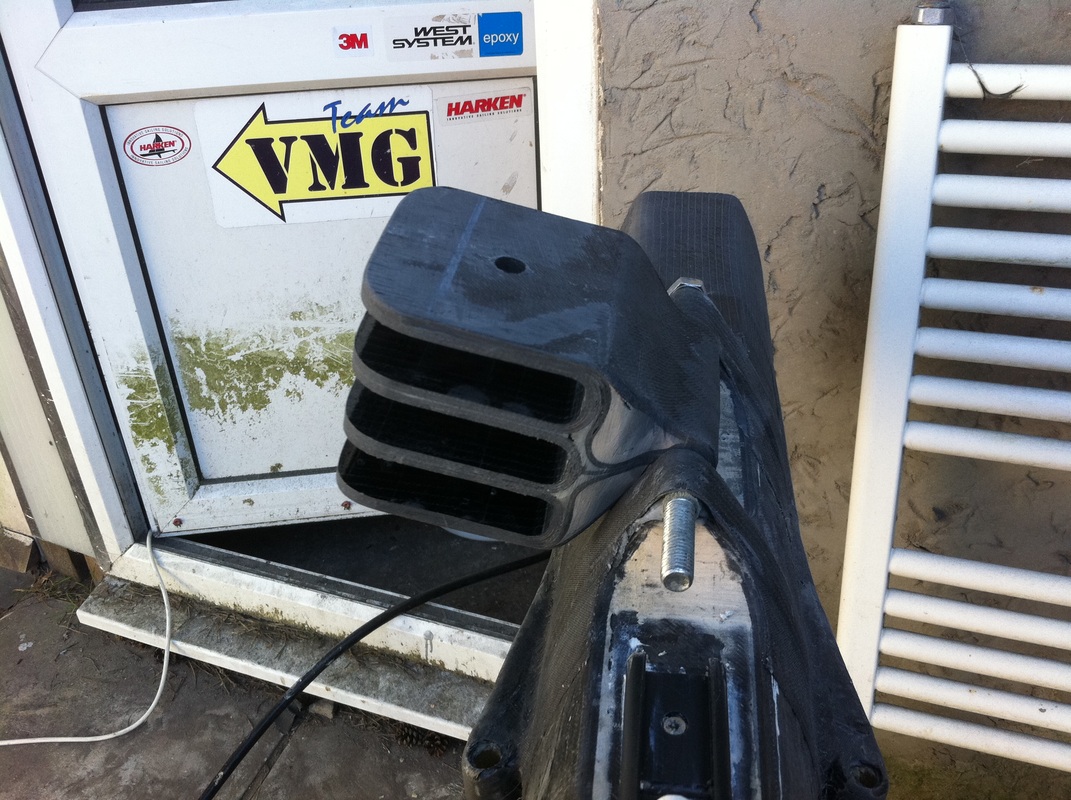
Spreader end

It has become bit of a standing joke that I can't make any component without incorporating Antal low friction eyes [Alfies]. Well, what better to house the diamond wires into the end of the spreaders?
The Ali rod helps to spread the load across the tubes [Which have their ends filled]
The Ali rod helps to spread the load across the tubes [Which have their ends filled]
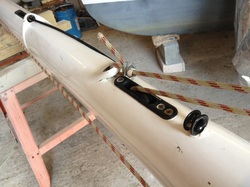
Gooseneck
The gooseneck is mounted on a pair of pintles on the back face of the mast and incorporates sheave mountings for the slab reefing

It weighed 65kg at this point with spreaders, sheaves and Tides Marine track fitted
Not sure if the foot was on
Halyards, standing rigging and diamond wires weren't
Not super light, but I wanted to be confident crashing about in waves with it!
Not sure if the foot was on
Halyards, standing rigging and diamond wires weren't
Not super light, but I wanted to be confident crashing about in waves with it!
Painting
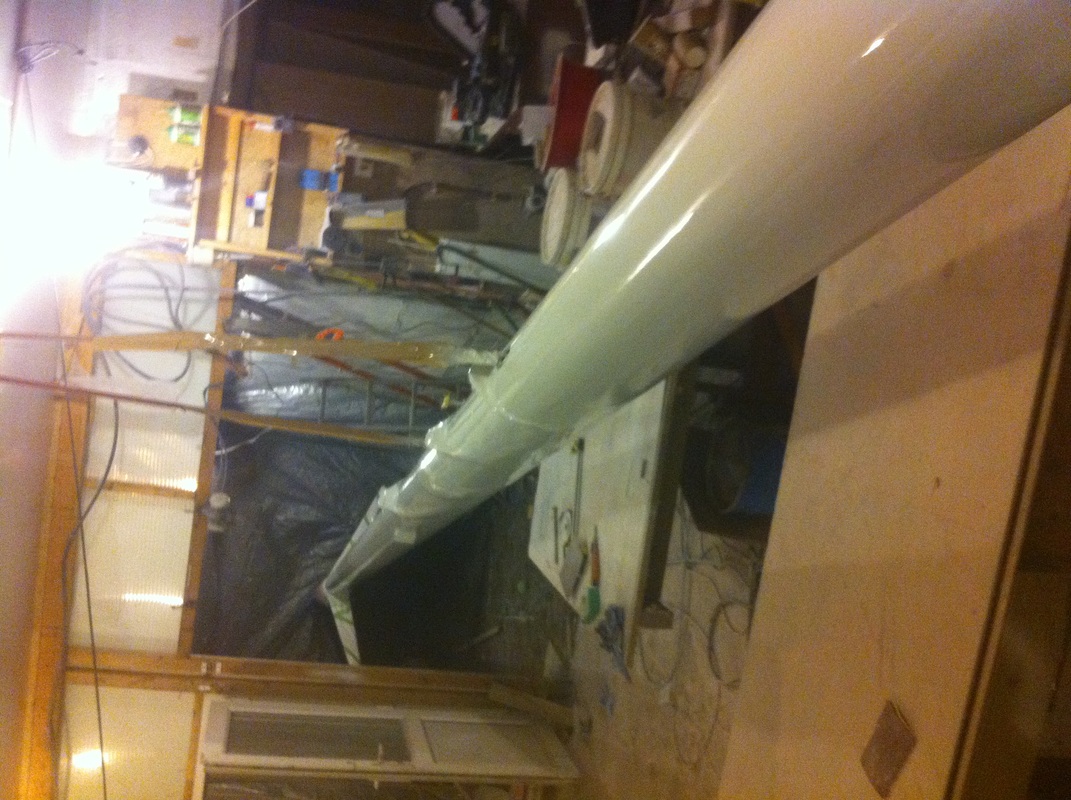
Filling and fairing wasn't too bad because it is mostly one convex shape
I had to paint it in two halves because the workshop wasn't long enough
Awlgrip used
I had to paint it in two halves because the workshop wasn't long enough
Awlgrip used
Forestay
The forestay tang is a large Alfie
Daimond tang is a kevlar tube
High load Antal sheave for the jib
The shroud anchors are 10mm Wichard folding padeyes on mounting pads with large backing pads [Not in view]
Daimond tang is a kevlar tube
High load Antal sheave for the jib
The shroud anchors are 10mm Wichard folding padeyes on mounting pads with large backing pads [Not in view]
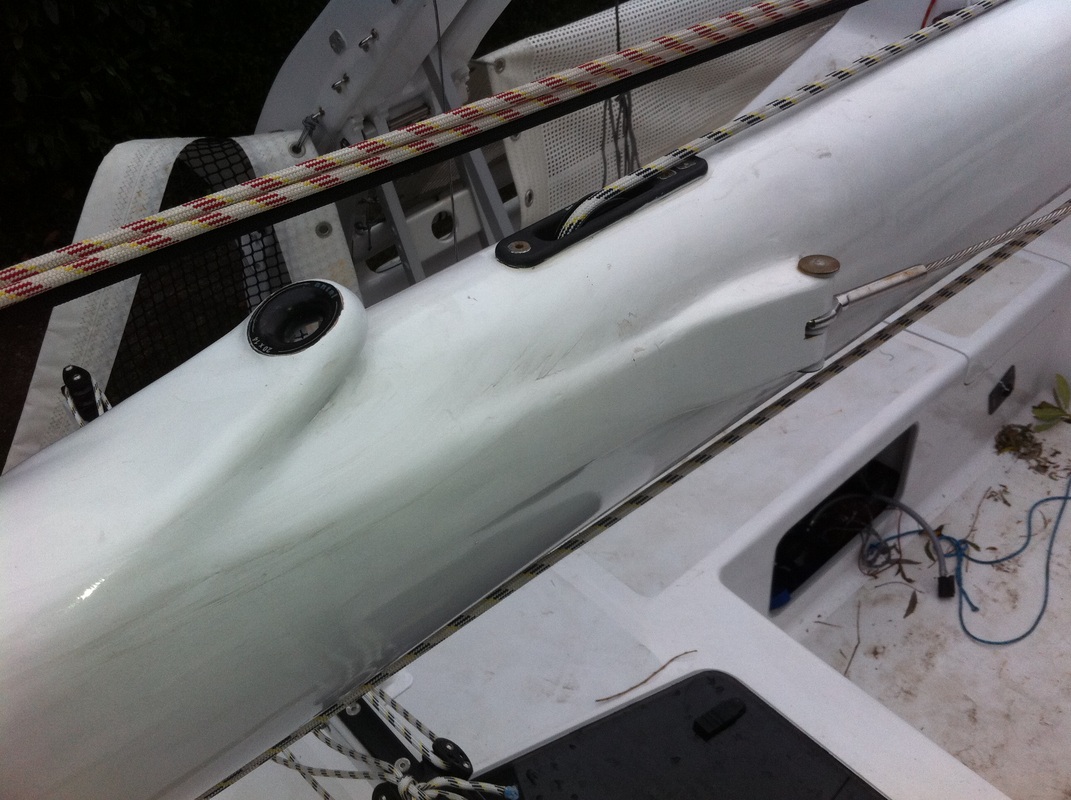
Spinnaker halyard
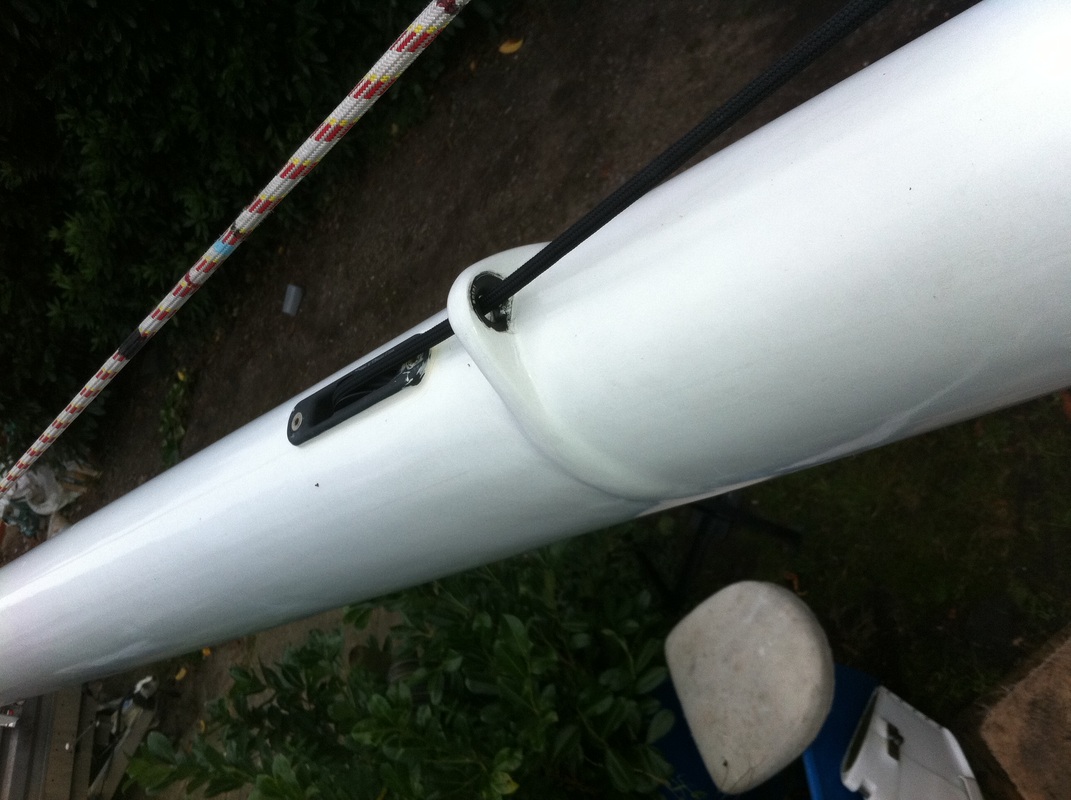
Standard spinnaker point is an Antal sheave and a medium Alfie
Screecher
A medium Alfie and high load sheave
Mast head
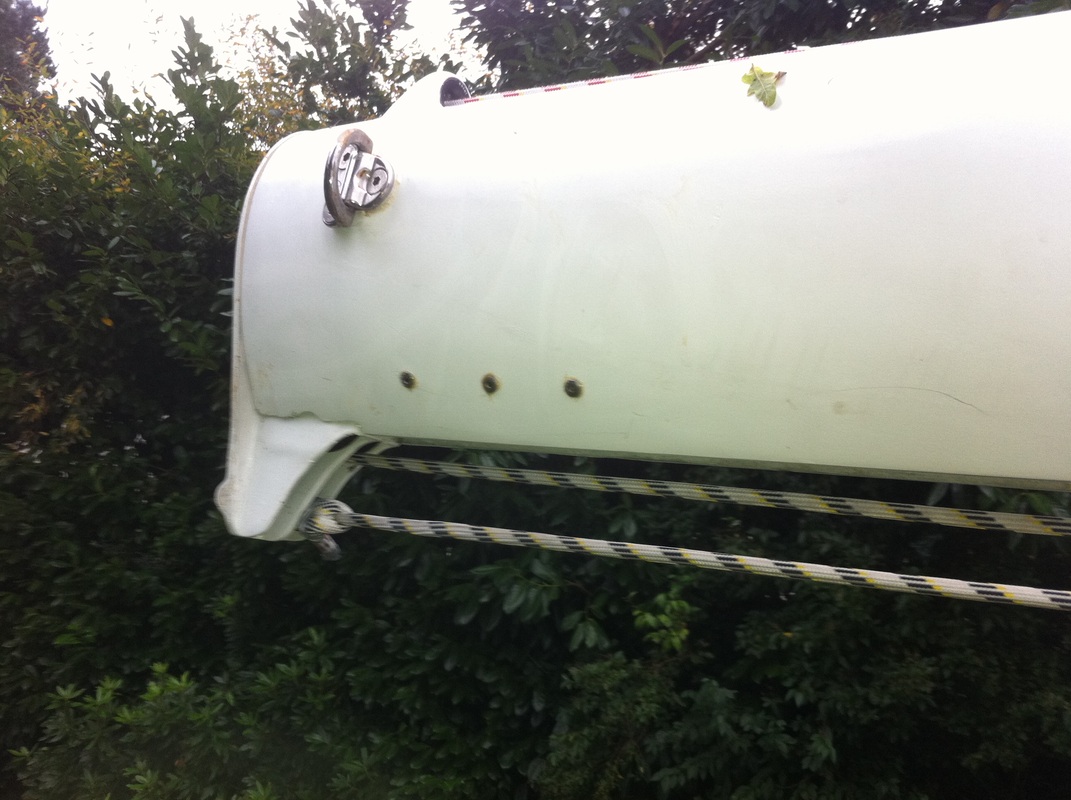
There is a removeable cassette that holds Harken sheaves for the main, masthead spinny and topping lift
A medium Alfie for the spinny guide
2 8mm Wichard folding padeyes for the runners
There are rivets for extra channel support where the mainsail headboard sits. Also at the reef points
A medium Alfie for the spinny guide
2 8mm Wichard folding padeyes for the runners
There are rivets for extra channel support where the mainsail headboard sits. Also at the reef points
Boom
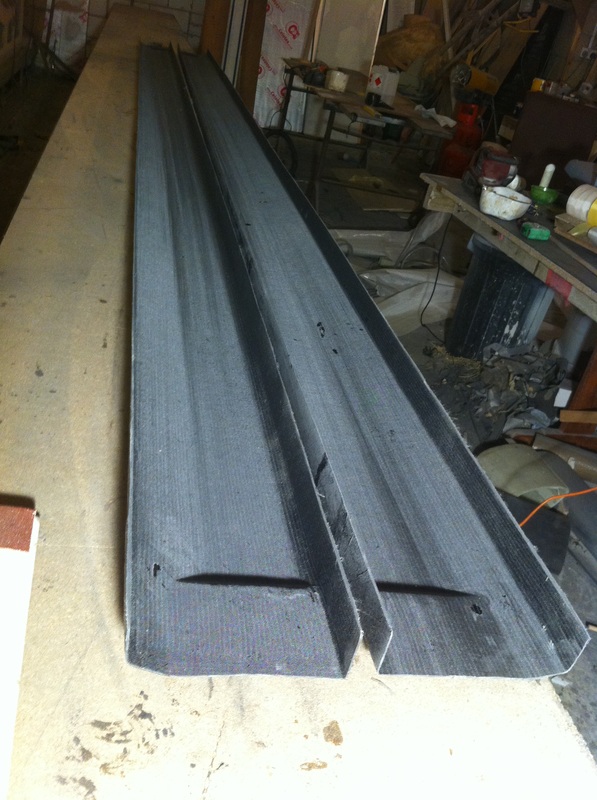
This is the mould for half the boom
The taper to house the gooseneck is repeated at both ends so that the 2 halves are opposite
A similar but slightly lighter lay-up as the mast is used
The taper to house the gooseneck is repeated at both ends so that the 2 halves are opposite
A similar but slightly lighter lay-up as the mast is used
Boom
Joining the 2 halves was a bit of fun. The outside biax tape was easy, but the inside tape had to be wetted out on the bench, rolled around a 75mm piece of tube and un-rolled inside the tube.
You get to be an expert at key-hole surgey and inventing tools to fit on the end of long sticks!
You get to be an expert at key-hole surgey and inventing tools to fit on the end of long sticks!
Assembly
The assembled gooseneck can be seen. Although the sheaves are in place, the clew reefing lines are not [They will exit under the gooseneck]
The mainsheet and clew are achored to the boom with velcro'd dux webbing just wrapped around twice
The 'Park Lane' hoops stop the sail getting crushed by the lazyjacks
The mainsheet and clew are achored to the boom with velcro'd dux webbing just wrapped around twice
The 'Park Lane' hoops stop the sail getting crushed by the lazyjacks
Sail Battens
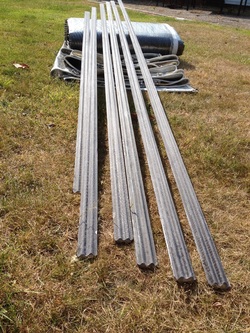
Bit of an issue getting anything off the shelf that is long enough for the F-32
I started off by making composite battens of tapered 200kg foam with carbon/kevlar skins. These were pretty good once I had the sizing and lay-up sorted. They are a bit brittle though and we managed to make a mess of them gybing on the spot trying to recover the overboard spinny during the RTI race.
That inspired me to get on with my 'Corrugated' batten plan. They are vacuum bagged onto a male mould in solid carbon. The corrugation tapers to almost nothing at the luff.
Results are pretty good and they are certainly more robust
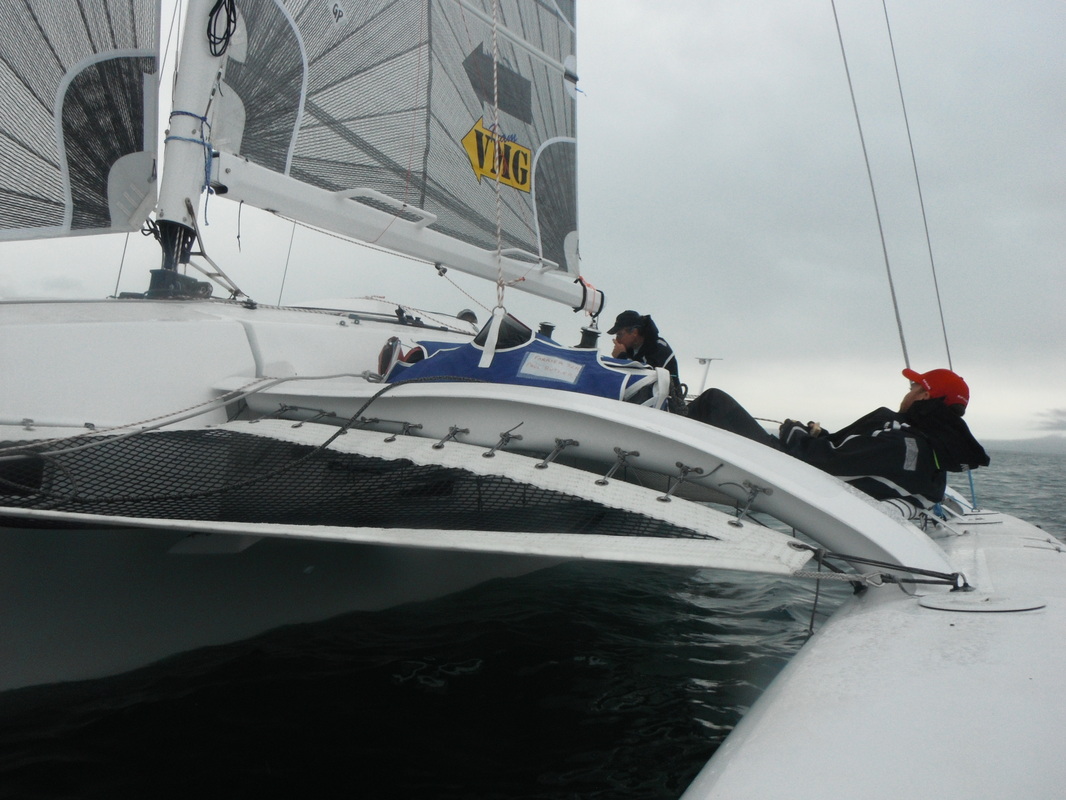
Rig Update 3 years on.......
All in all, the mast has been great and I am glad that I went to the effort. We have done some daft things but the rig has always forgiven.
I did make a few alterations though.....
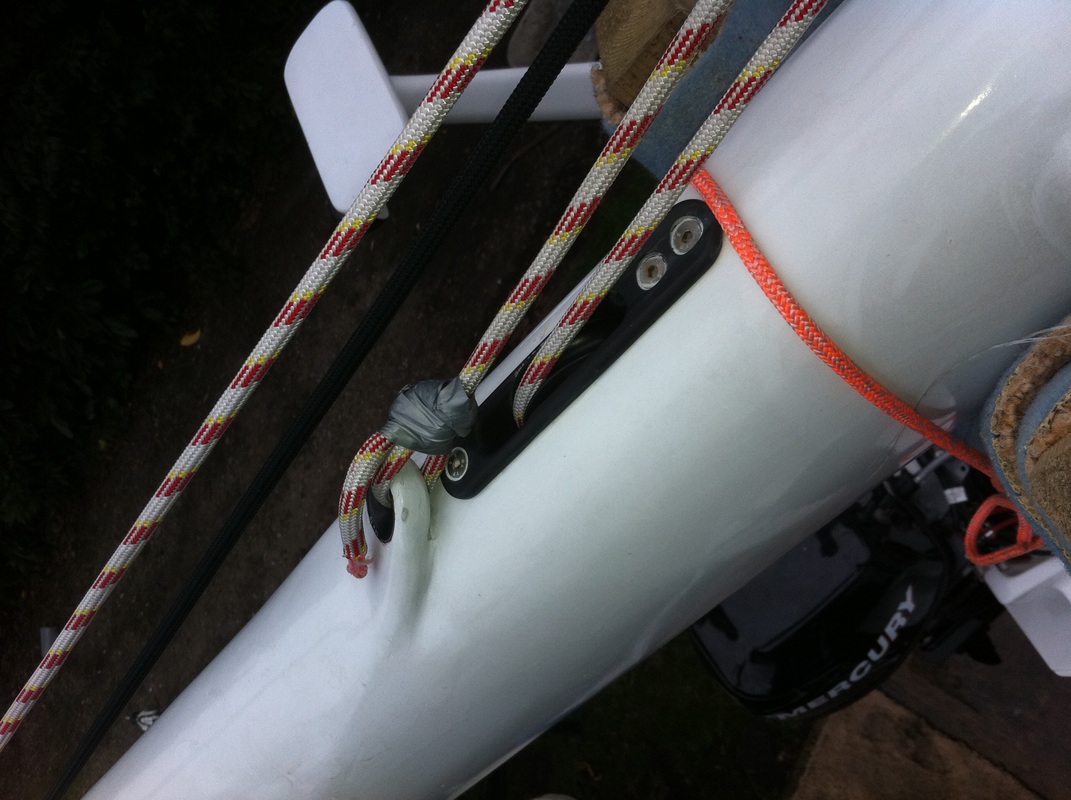
The screecher halyard always went up with a twist to the point where it locked up and would no go up any more OR DOWN! More separation was neede between the fixed and moving parts so I mounted an Alfie just below the sheeve. [Just held with plasticene in the mock up picture]
The spreaders were too long. the mast is pretty stiff but we were getting too much prebend. taking off 100mm also allows the jib to be sheeted closer upwind
A couple of purchases was added to the mainsheet, I think we are up to 32:1 now [8:1 coarse and 4:1 fine tune inside the boom]
I did make a few alterations though.....
The screecher halyard always went up with a twist to the point where it locked up and would no go up any more OR DOWN! More separation was neede between the fixed and moving parts so I mounted an Alfie just below the sheeve. [Just held with plasticene in the mock up picture]
The spreaders were too long. the mast is pretty stiff but we were getting too much prebend. taking off 100mm also allows the jib to be sheeted closer upwind
A couple of purchases was added to the mainsheet, I think we are up to 32:1 now [8:1 coarse and 4:1 fine tune inside the boom]
